To add a membership to a customer's profile within our system, please follow these step-by-step instructions:
Accessing the Customer Tab:
Log in to the system using your credentials and navigate to the "Customer" tab from the main menu or dashboard.
Search for the Customer:
Utilize the search bar within the Customer tab to locate the specific customer by entering their name.
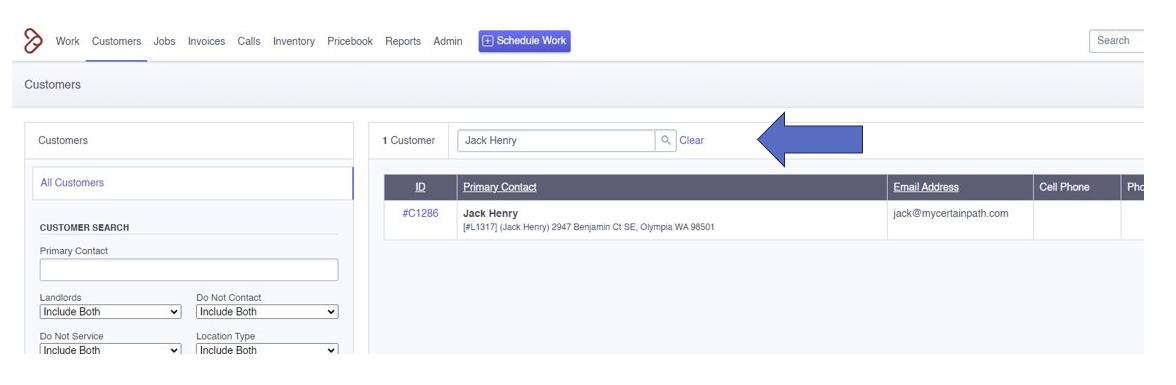
Select the Customer's Name:
Once the search results appear, identify and click on the customer's name displayed in blue. This action will direct you to the detailed view of the customer's profile.
Accessing Customer's Page:
After clicking on the customer's name, you'll be directed to the customer's individual page, where their information and activities are displayed.
Adding Membership:
Look for the "Actions" option in the upper right corner of the customer's page. Click on "Actions" to reveal a dropdown menu.
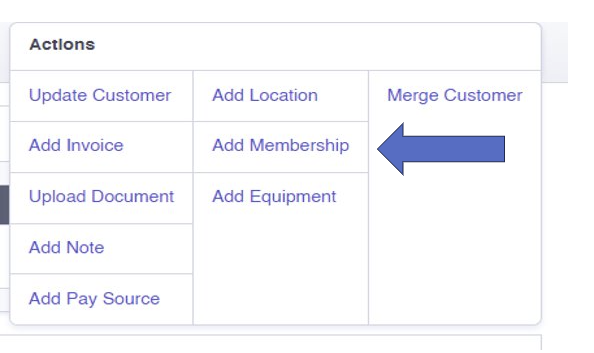
Select "Add Membership":
Within the dropdown menu, choose the "Add Membership" option. This action will initiate the process of associating a membership with the customer's profile.
Membership Details:
The system will prompt you to select the type of membership from the available options. Choose the desired membership plan for the customer.
Setting Payment Frequency and Amount:
Select the preferred payment frequency (e.g., monthly or annually) for the membership. Enter the price or billing amount for the chosen membership.
Assigning Payment Source:
Choose a payment source for the membership to ensure automated billing. This may involve selecting a credit card on file or specifying a payment method to enable auto-billing for the membership fees.
Membership Duration:
Enter the start and end dates for the membership. Most customers opt for a yearly membership, so ensure the start and end dates reflect this choice.
Finalizing the Process:
Review all the entered information to ensure accuracy and completeness.
Once all details are confirmed, proceed to save or finalize the membership addition by clicking an appropriate confirmation or save button provided by the system.
Please Note:
Ensure accuracy in the payment amount, payment frequency, and membership details to avoid billing discrepancies or customer dissatisfaction.
Double-check the selected payment source to guarantee seamless and uninterrupted billing for the membership.
Verify the start and end dates to accurately reflect the desired membership duration.
Always provide clear communication to customers regarding their selected membership plan, billing frequency, and associated terms.
Following these steps will enable you to efficiently add a membership to a customer's profile within our system, ensuring smooth billing processes and enhanced customer service.