Use your login credentials to access the FieldEdge dashboard.
a. Navigate to the Customer Tab
From the left-hand navigation panel, click on Customers.
b. Add Required Columns to the Report
Click the green “+” icon near the top of the customer list.
Select the following columns to include in your report:
Account ID
Address 1
City
Full Name
Default Agreement Plan
State
Zip
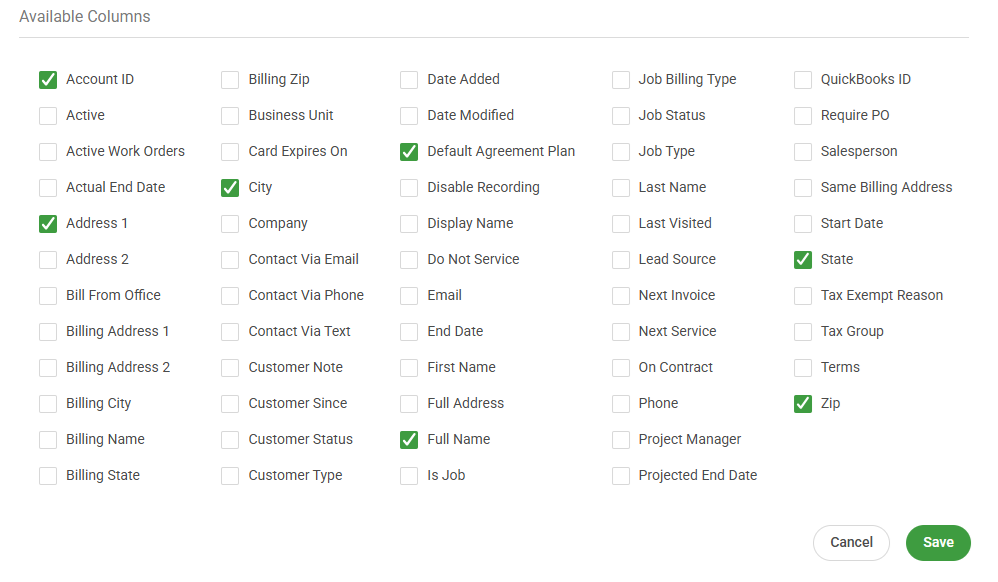
Click the green Save button once all fields are selected.
c. Apply Filters
Review all filters at the top of the screen and ensure each is set to All.
Click Apply Filters in the top-right corner.
d. Export the Customer Report
Click the three-dot ellipsis (⋯) next to the Customers + button.
Select Export All as CSV.
Save the file with a clear name, such as: Customer_Report_FieldEdge_2024.csv.
a. Navigate to the Invoice Tab
From the left-hand navigation panel, click on Invoices.
b. Add Required Columns to the Report
Click the green “+” icon near the top of the invoice list.
Select the following columns to include:
Address 1
Business Unit
City
Customer Full Name
Date
Invoice #
State
Total
Zip
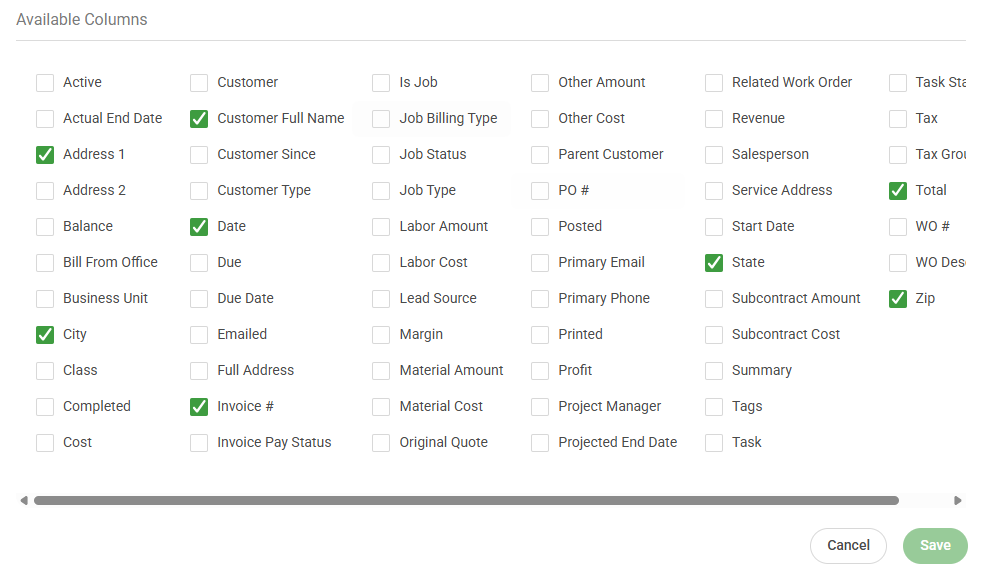
Click Save after selecting the appropriate columns.
c. Apply Filters
Review all filters at the top of the screen and ensure each is set to All.
Be sure the Date filter is also set to All.
Click Apply Filters in the top-right corner.
d. Export the Invoice Report
Click the three-dot ellipsis (⋯) next to the Invoices button in the top-right corner.
Select Export All as CSV.
Save the file using a descriptive name, such as: Invoice_Report_FieldEdge_2024.csv.
If you encounter any issues with these steps, please reach out to the support team. Alternatively, the data can be pulled remotely for you if necessary.
