Introduction: Adding inventory to a warehouse management system is a crucial task for maintaining accurate stock levels and ensuring smooth operations. There are various methods to accomplish this, including exporting the stock file to an Excel sheet and entering new quantities and parts or manually adding each item in through the system's interface.
In this knowledge base article, we will outline step-by-step instructions for both methods, providing guidance on how to efficiently add inventory to your warehouse management system.
Method 1: Exporting Stock File to Excel Sheet and Updating Quantities:
Access the Warehouse Management System:
Select the Inventory tab
Navigate to the inventory section from the drop down and select Warehouses.
Export Stock File:
Select the warehouse (shop or truck) that needs to be edited.
Select the Actions button in the upper right corner.
Select Export stock
Open Excel Sheet:
Once the stock file is exported, locate and open the Excel sheet.
The sheet should contain columns for item names, part numbers, current quantities, etc.

Update Quantities:
Locate the rows corresponding to the items you want to add inventory for.
Enter the new quantities in the appropriate column(s) designated for quantity updates.
You can add an additional line to add more stock of another item if needed as well.
If you are adding stock for more than one truck make sure each warehouse name is listed in Column B under warehouse and add the stock records for that warehouse as well.
Save Changes:
After updating the quantities, save the Excel sheet.
Import Updated Stock File:
Return to the main warehouse list.
Select Import Stock in the upper right corner
Upload the Excel sheet containing the updated quantities. Before selecting Import Stock you will need to decide if you want to overwrite the current stock levels or add to them. If you are adding to the current inventory select the box to Update Existing Stock Quantities then select import stock:
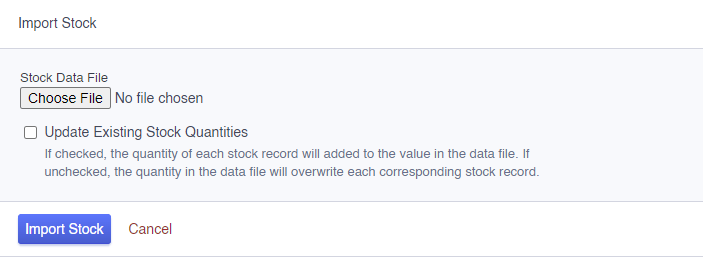
The system should process the file and update the inventory accordingly.
Method 2: Manually Adding Stock via System Interface:
Access the Warehouse Management System:
Select the warehouse that needs to be edited.
Navigate to Add Stock Section:
Select Actions, then select add stock.
Enter Item Details:
In the "Add Stock" interface, you'll find fields to enter item details such as name, part number, quantity, etc.
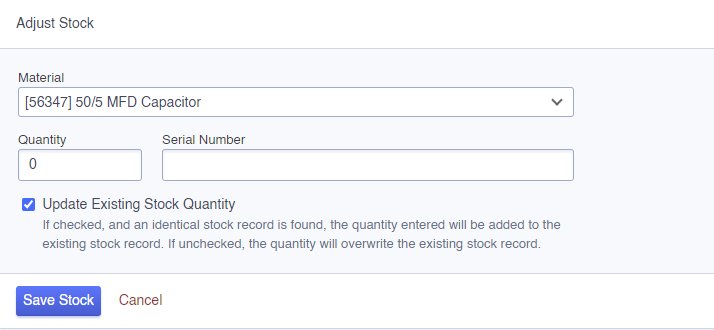
Fill in the required information for each item you want to add to the inventory as well as if the item needs to be added to the current count or if it needs to overrides the current count.
Verify Information:
Double-check the entered details to ensure accuracy, especially item names and quantities.
Save Stock:
Once all the necessary information is entered, proceed to select the Save Stock button.
Confirmation:
After adding stock, the system should provide a confirmation message indicating that the operation was successful.
Conclusion: Adding inventory to a warehouse management system is essential for maintaining accurate stock levels and efficient operations. Whether you choose to update quantities via Excel sheet export or manually add items through the system's interface, following the outlined steps will help streamline the process and ensure data accuracy. By regularly updating inventory, you can effectively manage stock levels and meet customer demands.