This guide will walk you through the process of viewing and searching for active jobs within CertainPath, ensuring you can efficiently manage your business operations.
Accessing the Jobs Page
Access the Jobs Tab: To begin, open CertainPath and click on the "Jobs" tab located at the top of the page.

Viewing All Jobs or Today's Jobs
Default View: By default, the Jobs page displays all jobs associated with your business. You can navigate through this list to find specific jobs.
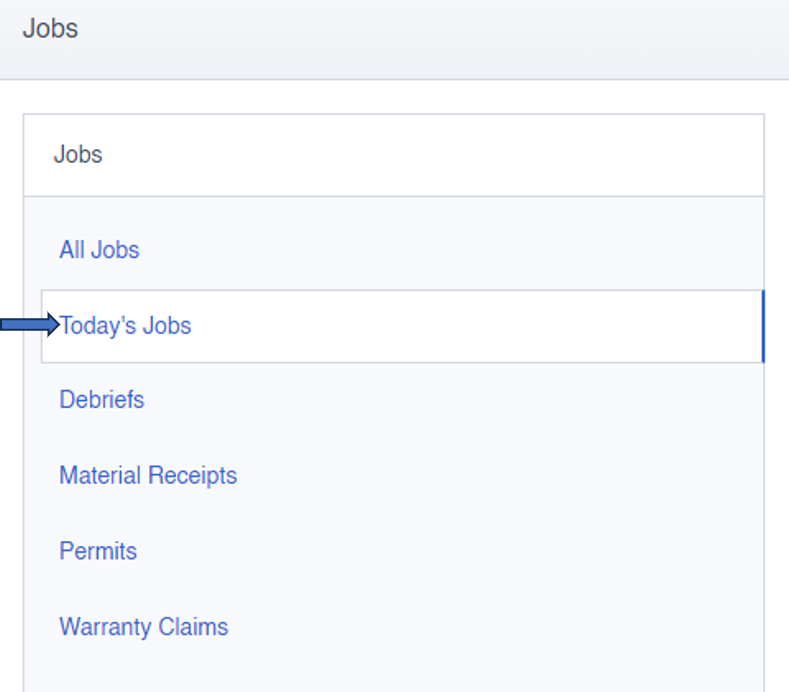
Today's Jobs: To view only jobs scheduled for today, click on the "Today's Jobs" tab on the left-hand side of the page.
Searching for Specific Jobs
Using the Search Bar: If you have specific information about the job, such as the customer's name, address, or job number, use the search bar located at the top of the page under the "Jobs" tab.

Click into the open field marked "Search Jobs."
Enter the relevant information.
Click the magnifying glass icon to initiate the search.

Utilizing Job Search Fields: For more detailed searches, you can utilize the Job Search fields located on the left side of the screen under the "Jobs" section.
Scheduled Start and End Date: Filter jobs based on their scheduled start or end dates.
Assigned Agent or Business Unit: Find jobs assigned to specific agents or business units.
Service Type, Call Reason, Ad Campaign, and Job Priority: Search for jobs based on their source, call reason, ad campaign, or priority.
Canceled Jobs: Easily locate canceled jobs by specifying cancellation reasons.
City, State, or Postal Code: Search for jobs in specific locations.
Job Status: Filter jobs by their status, whether they are open, closed, or canceled.
Narrow Down Your Search: Once you've entered your desired parameters, click the blue "Search" button to refine the list of jobs displayed.
By following these steps and utilizing the search options within CertainPath, you can efficiently navigate and find specific jobs, streamlining your workflow and ensuring you stay organized in your business operations.
Discover how to access and review the comprehensive history of a job assignment within CertainPath. This feature allows you to track key events like job booking, dispatching, and status changes, providing valuable insights into your business operations.
Accessing the Assignment History
Navigate to the Jobs Tab: Start by clicking on the "Jobs" tab located at the top of the CertainPath page.

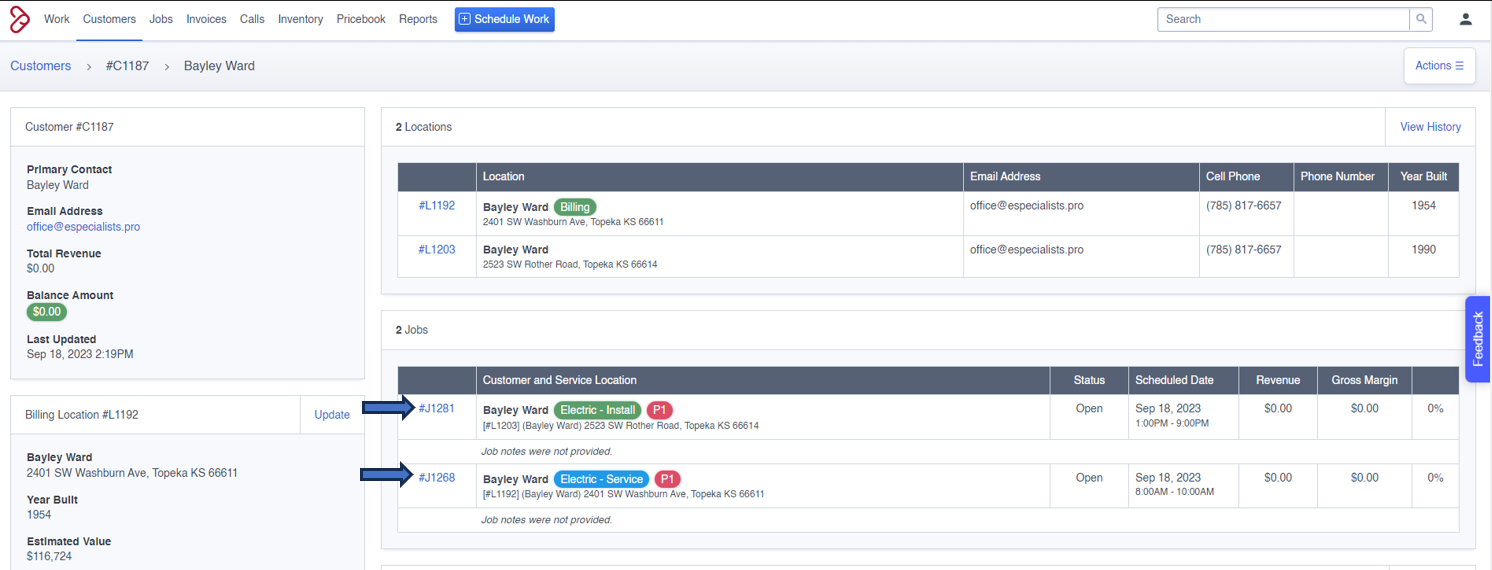
Select the Specific Job: To access the assignment history of a particular job, locate the job you're interested in within the Jobs tab. Click on the blue hyperlinked job number, which is positioned to the left of the customer details.

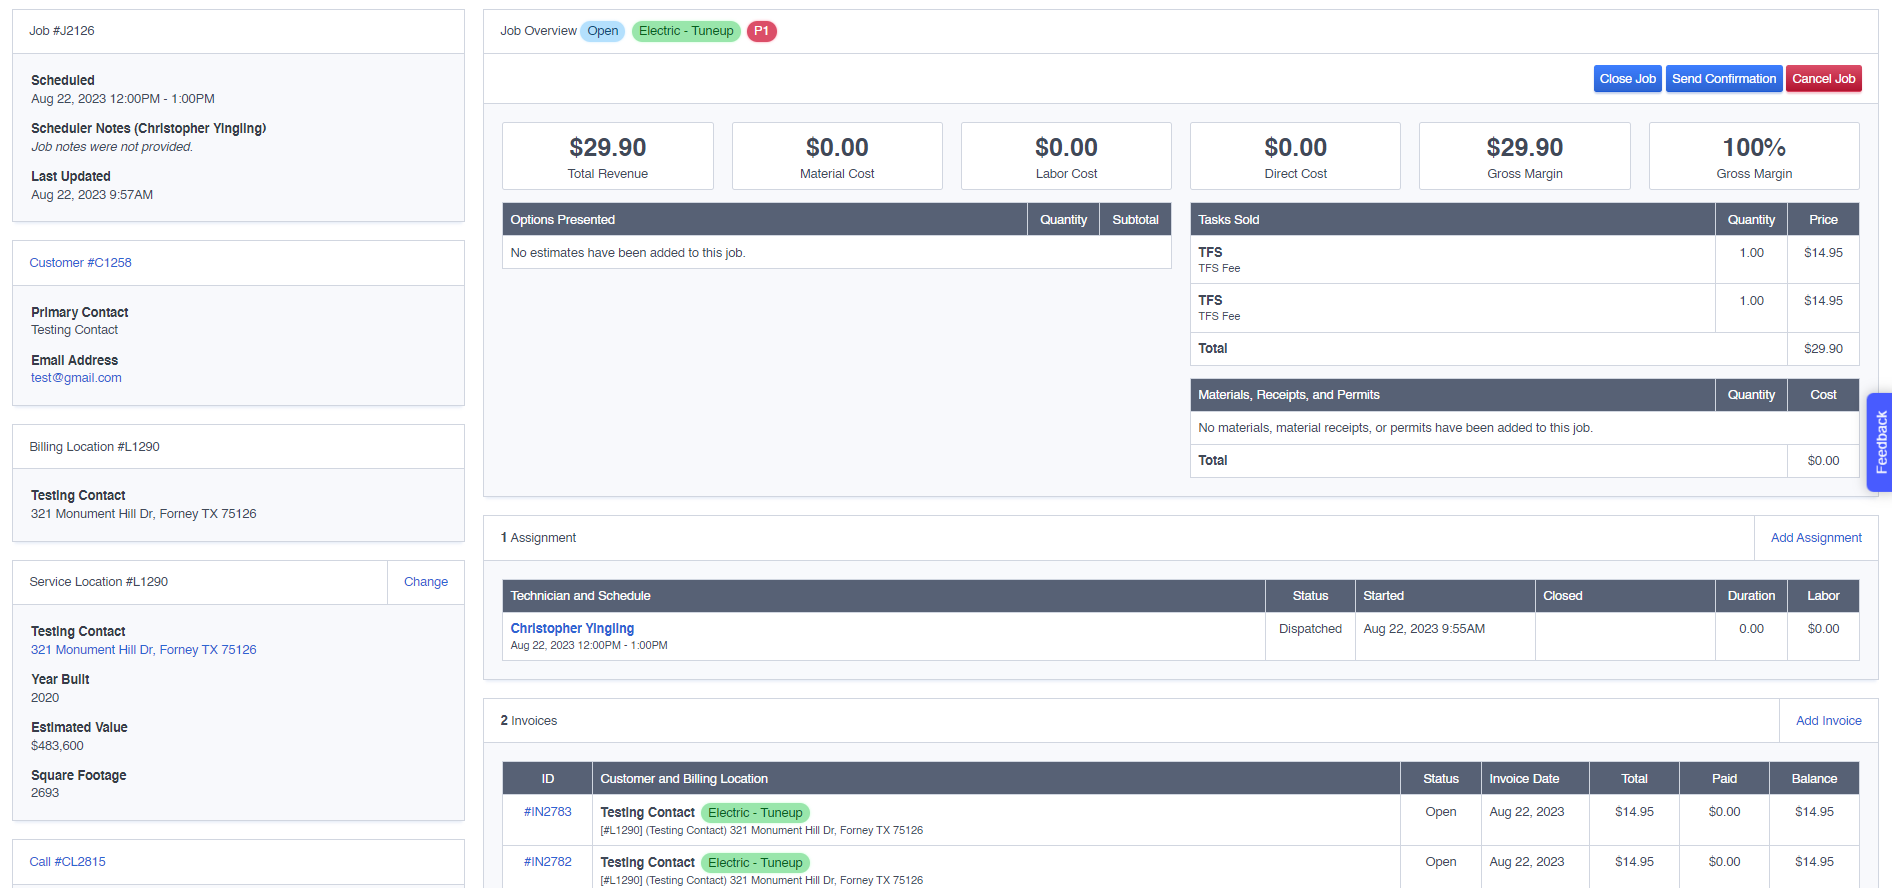
Open the Job: Once you've clicked on the job number, you'll be taken to the job's details page. Here, you'll find essential information related to the job.

Navigate to the Assignment Section: Scroll down the page until you reach the "Assignment" section. In this section, you'll see details about the assigned technician and the schedule for the job.

Access the Assignment: To delve deeper into the job assignment history, click on the blue hyperlinked name of the assigned technician. This action will open the assignment details.

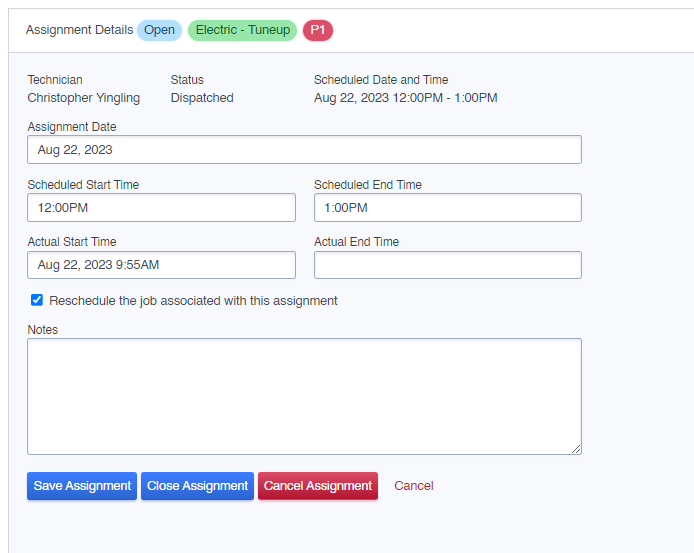
Review Assignment Details: Inside the assignment details, you'll find valuable information such as the scheduled start and end times, as well as the actual start and end times of the job.
Viewing the Assignment History
Access the Event History: To view a comprehensive history of events related to the job assignment, locate the button at the top-right of the page marked "View History." Click on this button to proceed.
Popup with Event History: After clicking "View History," a popup will appear, displaying a chronological list of events related to the job assignment. You'll find details such as start and end times, dispatch times, and any changes in the job's status.

By following these steps, you can easily access and review the complete history of a job assignment in CertainPath. This feature empowers you to monitor job progress, track changes, and ensure transparency in your business operations.
Learn how to efficiently manage and access debriefs within CertainPath, allowing you to keep detailed records and streamline your business processes.
Accessing Debriefs
Navigate to the "Jobs" Tab: Begin by clicking on the "Jobs" tab located at the top of the CertainPath page. [Insert Image of Jobs Tab Here]
Select the "Debriefs" Tab: Within the "Jobs" tab, move to the left side of the screen and click on the "Debriefs" tab. [Insert Image of Debriefs Tab Here]
Searching for Debriefs
Basic Debrief Search: If you're looking for a specific debrief or set of debriefs, you can initiate a basic search. Use the search bar at the top of the page to enter the debrief or job number. After entering the relevant information, click the magnifying glass icon to initiate the search. [Insert Image of Search Bar Here]
Advanced Debrief Search: For more detailed searches, take advantage of the "Debrief Search" section on the left-hand side of the screen. Here, you can filter debriefs based on various parameters:
Date: Search debriefs by start, end, or follow-up date.
Technician: Locate debriefs associated with a specific technician.
Service Type: Filter debriefs by the service type.
Assigned Warehouse: Find debriefs assigned to a particular warehouse. [Insert Image of Debrief Search Fields Here]
Viewing Debrief Details
View a Debrief PDF: After locating the desired debrief, you have multiple viewing options. Click on the blue hyperlinked "View" button under the document column to access a PDF of the completed debrief, provided the debrief has been completed. [Insert Image of View Button Here]
Access Debrief Details within a Job: Alternatively, you can access more detailed debrief information by clicking on the blue hyperlinked debrief number, situated to the left of the job number. This action will direct you to the debrief section of the specific job. [Insert Image of Debrief Number Link Here]
Updating a Debrief
Update Debrief: If you need to make changes or add additional information to a debrief, click the "Update Debrief" button within the job screen. [Insert Image of Update Debrief Button Here]
Set Follow-Up Date and Add Notes: On the following screen, you'll be able to set a follow-up date and include notes and follow-up reasons in the debrief. [Insert Image of Follow-Up Options Here]
By following these steps, you can efficiently manage and access debriefs in CertainPath, ensuring you have a comprehensive record of job-related information and facilitating smoother business operations.
Effective job management is essential for the seamless operation of many businesses. Merging jobs, particularly when they belong to the same customer, can significantly streamline processes and reduce redundancy. In this comprehensive guide, we will provide you with a step-by-step approach on how to merge jobs under the same customer within CertainPath Software. We will also detail the process of merging jobs associated with different customers, ensuring you can efficiently manage your job data.
Step 1: Confirm Same Customer
1.1. Start by verifying that the jobs you intend to merge are associated with the same customer within CertainPath Software. Ensure that both jobs are listed under the customer's profile.
Step 2: Merging Jobs
2.1 Open the job you wish to merge by selecting the job number associated with it.
2.2. Inside the job details, you'll find the "Merge Job" button in the top right corner. Click on this button to proceed.

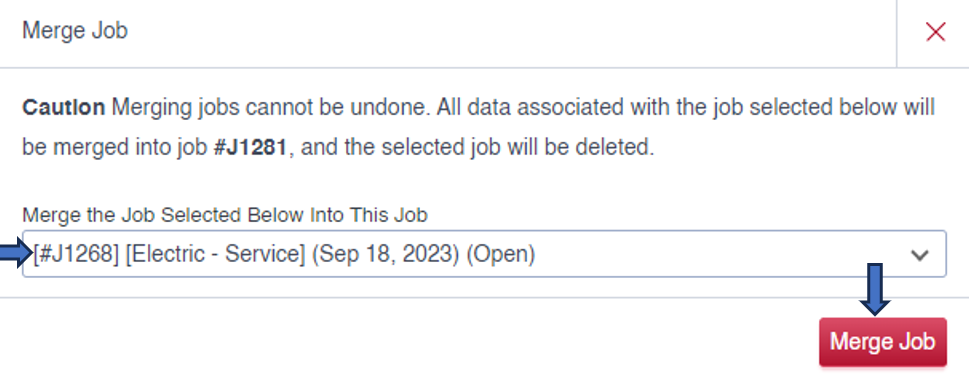
2.3. A drop-down menu will appear, enabling you to choose the job you want to merge with the current one.
2.4. Once you've selected the appropriate job, click on the "Merge" button, typically marked in red.
2.5. It's imperative to note that this merge action is irreversible; once the jobs are merged, they cannot be separated. Ensure that you have selected the correct job before proceeding.
Step 1: Contact Support
1.1. If the jobs you wish to merge are associated with different customers, a distinct approach is necessary.
1.2. Initiate the process by sending an email to "softwaresupport@mycertainpath.com."
Step 2: Email Details
2.1. In your email to the support team, provide the following critical information:
Current customer and job number: Specify the customer and job you wish to move.
New customer and location number: Clearly indicate the customer and location to which the job should be relocated.
Step 3: Support's Action
3.1. Once your support request has been submitted, the CertainPath Software support team will take the required steps to relocate the job to the correct customer and location.
3.2. Once the job has been successfully moved, you can then proceed to merge it with another job on that same customer, as described in the previous section.
Efficient job management is the linchpin of business success, and the ability to merge jobs can significantly enhance your workflow, reduce duplication, and enhance overall organization. Whether you are merging jobs under the same customer or addressing jobs associated with different customers, following these outlined steps will empower you to proficiently manage your job data. It is essential to exercise caution when merging jobs, as this process is irreversible, and precision in your selections is paramount for effective job management.